Magic DJ


Design Goal

We’re creating a new live music playing and editing interface for club DJ, especially Eletronics & Hip-hop DJ. When DJs perform club music, they’re able to use this innovative device to not only generate music in a brand new way, but also various visual effects. Furthermore, they can communicate with audience with the assistance from this interactive music interface. Most important of all, this interface help musician discover the possibility of live music performance by combining visual and audio impulse, to reach higher level of art.


Background Analysis

Observation & Interview
We know those dance clubs are most of the time dark, with decorating spotlight (various light source), noisy, humid, and hot sometimes.


Observation:
DJ Roy Venegas in ITP radio


Interview:
DJ Michael Harari

Michael mentioned that most of the DJ are busy doing song playing and real time editing, so if there's some instrument that can help them to make the editing process easier and convenient, that will very helpful.
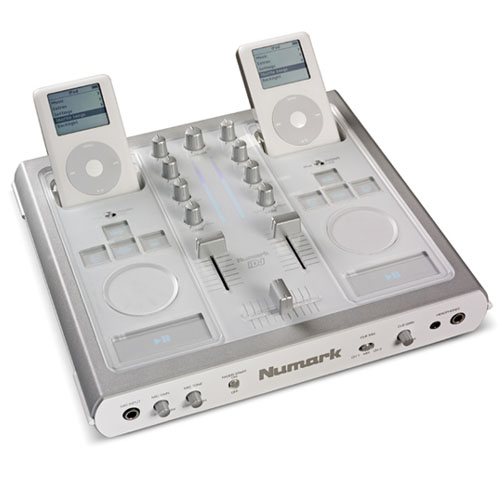
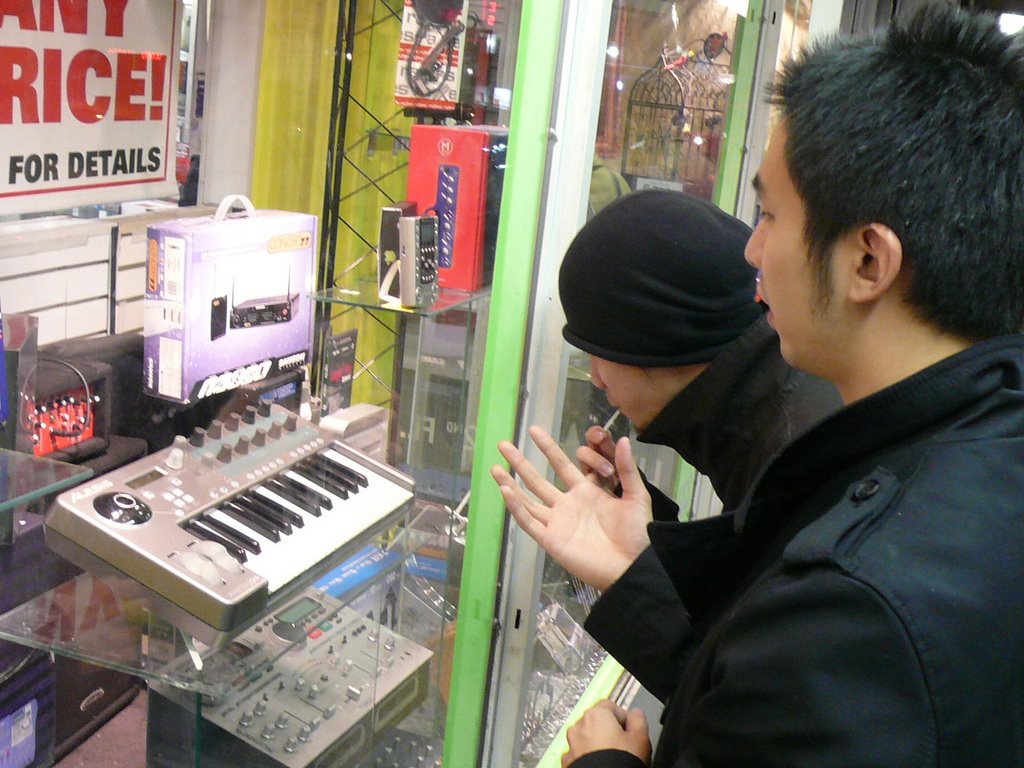
Market Survey:
We went to several music instrument shop and check the existing product.


Design Orientation

Ambiance
Interface must be funky and innovative, such as [ Nintendo Wii ]
(see: http://wii.com/jp/movies/sports-01-jp-a/ )


Function
1. Keep several original functions that a DJ will need, such as shifting the music tempo, change volume, panning effect, filters…

2. Generate new interaction between DJ and audience.

Shape & Style
The design will follow the style of DJ general equipment, but the shape will be a stunning new style.

Usability
Although the interface is a brand new one, but the device operation process is designed based on the general DJ equipment


Idea Generating


Making A Prototype

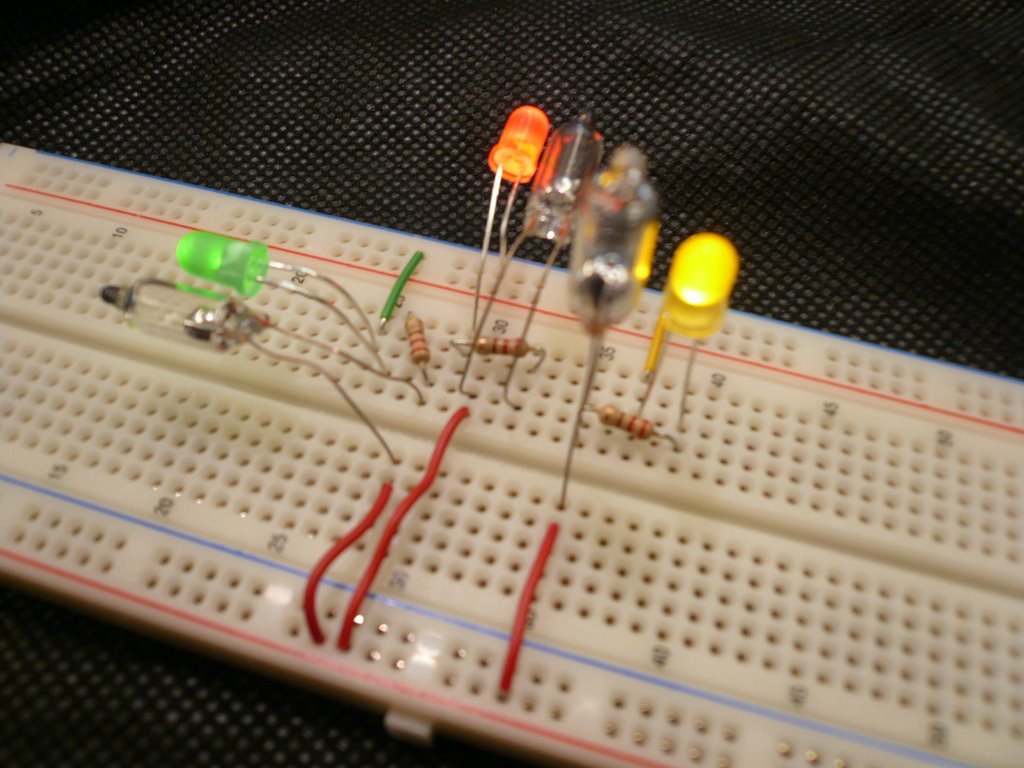
We try mercury switch and ball switch as a frequency detect device, to calculate the frequency of DJ's shaking head.

Simply by hooking them up onto breadboard and Arduino board, we can get the rough idea about how fast a DJ should shake his head to generate fast music tempo.


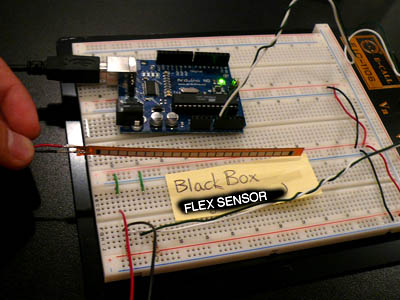
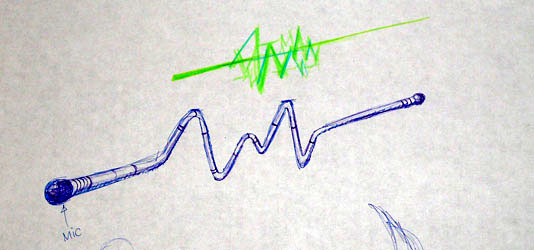
and then we also try flex sensor to create the magic wand that can generate different sound.


Micro-controller Code (Arduino board):

int flexPin1 = 0;
int flexValue1 = 0;
int flexPin2 = 1;
int flexValue2 = 0;
int flexPin3 = 2;
int flexValue3 =0;
int flexValue4 = 0;
int flexPin4 = 3;

//int ballValue1;
int ballValue2;
//int ballValue3;

//int ballPin2 = 2;
int ballPin3 = 3;
//int ballPin4 = 4;
int switchPin8 = 8;

int shakeIt1 = 0;
int shakeIt2 = 0;

int counter = 0;
int tempo = 135;
int switchPrevious = 0;
int switchstate = 0;
int delayTime = 0;

//led
int ledPin = 9; // LED connected to digital pin 13
int value = LOW; // previous value of the LED
long previousMillis = 0; // will store last time LED was updated
long interval = 1000; // interval at which to blink (milliseconds)


void setup() {

//pinMode(ballPin2, INPUT);
pinMode(ballPin3, INPUT);
//pinMode(ballPin4, INPUT);
pinMode(switchPin8, INPUT);
pinMode(ledPin,OUTPUT);
Serial.begin(9600);

}

void loop() {
flexValue1 = analogRead(flexPin1);
flexValue2 = analogRead(flexPin2);
flexValue3 = analogRead (flexPin3);
flexValue4 = analogRead (flexPin4);
switchPrevious = digitalRead (switchPin8);

if (switchPrevious == 1){
switchstate =1;
switchPrevious = 0;
}

if (switchstate==0){
//ballValue1 = 0;
ballValue2 = 0;
//ballValue3 = 0;

counter = 0;
}

if (switchstate==1){
counter++;
//ballValue1 = digitalRead (ballPin2);
ballValue2 = digitalRead (ballPin3);
//ballValue3 = digitalRead (ballPin4);
}


if(ballValue2== 1){
shakeIt1++;
//ballValue1 =0;
ballValue2 =0;
//ballValue3 =0;
//&& ballValue2 == 1 && ballValue3 == 1
}

// let's say if when counter==275 equal to 10 seconds
if(counter==110){
tempo = (shakeIt1)*12;
switchstate = 0;
shakeIt1 = 0;
}
// NEW: set the counter value back to zero.
if(counter>300){
counter=0;
}

delayTime = int(tempo*1.47);

if (millis() - previousMillis > delayTime) {
previousMillis = millis(); // remember the last time we blinked the LED

// if the LED is off turn it on and vice-versa.
if (value == LOW)
value = HIGH;
else
value = LOW;

digitalWrite(ledPin, value);
}


Serial.print(flexValue1);
Serial.print ('\t');
Serial.print(flexValue2);
Serial.print ('\t');
Serial.print (flexValue3);
Serial.print ('\t');
Serial.print (flexValue4);
Serial.print ('\t');

/*Serial.print (ballValue1);
Serial.print ('\t');
Serial.print (ballValue2);
Serial.print ('\t');
Serial.print (ballValue3);
Serial.print ('\t');*/

Serial.print (tempo);
Serial.print ('\t');
Serial.print(switchstate);
Serial.print ('\t');
// when switchstate== 1, counter ++
Serial.print(counter);
Serial.print ('\t');
// when ball switch are all triggered, shakeIt1 += 1
Serial.print(shakeIt1);
Serial.print ('\t');
// calculate in certain time the shake frequency equal to tempo

Serial.println(); // print the flex value back to the debugger pane
delay(10); // wait 10 milliseconds before thenext loop

}


Product Outlook:


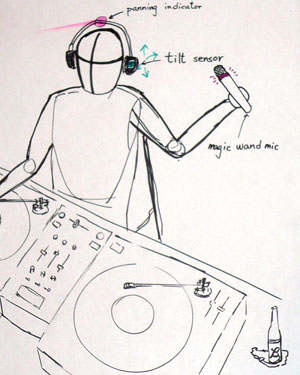
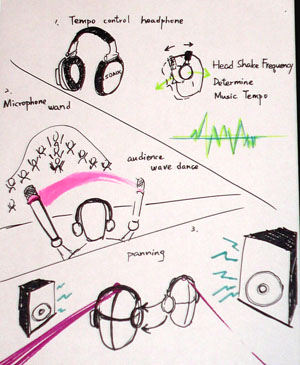
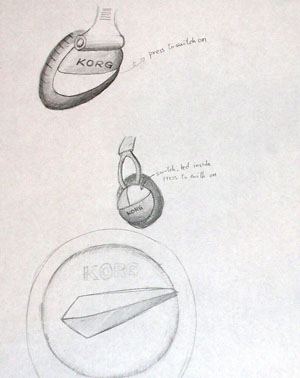
We put a switch onto the headphone(the red button as you can see in the picture), so that if the DJ want to change the music tempo, he can simply press the switch, and start shaking his head. The system will automatically measure the frequency of his shaking(by the ball switch we assemble inside the silver sphere), and use that frequency to change the music tempo as a mapping between shaking head and music tempo.

Not only the switch is on the headphone, inside the silver sphere case, we also put a super bright LED in it. So that the music tempo will be visualized by the blinking frequency inside the sphere. We left some transparency of the sphere by partially paint it to silver and left some part transparent.


There are four flex sensors in the transparent pipe which measure the bending situation of the pipe, and then send values to arduino board. We use Max/MSP to read the serial value from arduino, and use these value to change volumes of different music instruments, like bass, drum, and flute... etc.

At the same time, we send those values from Max/MSP to Processing, and Processing generate different animation controlled by these value (see animation below)


Performance of product


DJ Roger's shaking his head fast to make a hyper sound world!!


DJ Roger's bending his magic wand to make a hyper illusion world!!


*See Performance of DJ Show*
http://www.youtube.com/watch?v=hgEhMPCH7oQ

Visual Interaction
to see the animation change:
http://itp.nyu.edu/~kkt227/ICM/Final/Final_test_1_2_2_backgroundcolorchangeVer16_all_function/applet/


Animation Code (created by processing):

http://itp.nyu.edu/~kkt227/ICM/Final/Final_test_1_2_2_backgroundcolorchangeVer16_all_function/applet/Particleclass.pde

B.B-RSP (Black Box Rock Scissors Paper)

1. Why do we build

In the beginning of this semester (fall 2006), My friend Tommy initiated the idea of Rock- Scissors-Paper game. At that time, he wanted to build a machine, which can interact with human gestures in a way of simple common game. So we started to try different approach to create a device that can play R.S.P.(Rock Scissors Paper) with xx interaction.

2. Idea sources

One thing we were thinking about the traditional game is that, every game has a winner, loser, or end up with a tight game. Most of the time, Rock- Scissors-Paper is not really a game for having fun, but a tool to decide who has a privilege upon the other (just like flip the coin to decide which football team offend first). How can we enhance the joy within a common Rock- Scissors-Paper game? Now that we learn the powerful visual language environment -Processing, we can reward the winner in a very different way. For example, xx . In this case, we try to do animation in the whole process of playing Rock- Scissors-Paper, to guide the players to see a different world of possibility of Rock- Scissors-Paper.

Talking about animation, we think about comic as a funny and efficient way to demonstrate who wins the game. For our own taste, Tommy and I tend to grab the pictures we need from a Japanese comic book called “JoJo Amazing Adventure”, original by Haruki xx. We edit and cut out some pictures from the original comic, which are talking about Rock- Scissors-Paper game, and use them as animation sources.

The other thing is that sometimes people tend to win a game by cheating. In certain situation, those who don’t care about their reputation insidiously won the game by changing his gesture right after they saw opponent’s gesture. So how do we prevent the honest people from frustrated by those cunning bad guy? After a brainstorming, the idea come up to our mind: we hide both player’s hands in a box, so that they cannot see each other’s gesture, and the only way to know each other’s gesture is the winning or losing moment which is illustrated on a screen. By this way,

3. How to play

So here is the playing process:
1. Players wear the playing glove in one hand
2. Animation shows the introduction picture
3. Both players put their one hand in the boxes
4. Readers read their gesture and send it to computer
5. Animation shows player’s gestures
6. Animation shows who wins the game


4. Make the secret black box

How did we build this kind of game machine? Here is the process:
1. Make a pair of conductive glove with wire
2. Connect the wire on the glove onto the microcontroller (Arduino board)
3. Build boxes
4. Hook up the microcontroller with laptop

How do we detect the hand movement? Or a static gesture of our hand? The first thing come to our mind is flex sensor. Flex sensor is a long thin plastic that can generate different resistant from the angle you bend it, and send the value as signal to your microcontroller (for working mechanism, please go to http://www.imagesco.com/sensors/flex-sensor.html ) Unfortunately, we found out the value sent by flex sensors is not that easy to use and map to the hand gestures. Instead of receive analog value, we try the opposite way: digital read.

Based on the digital read idea, we use several naked wires, and sew them on certain position of a pair of glove, to make circuit initiate on the glove. While player doing Paper gesture, his five finger are spread out and no one touch any others, so that there is “no” circuit generated. And While he’s doing Scissors, his ring finger and little finger come really close to each other, so that contact each other where we sew the wire on, to generate “one” conductive circuit. As you probably can imagine, if a player is doing stone, not only his ring finger and little finger close, but also his index finger and middle finger touch each other, and that’s the other place we have sew on, and so there will be “two” circuits happen.

In other words, the number of circuit happening and the gestures are mapping like this:

Gesture Circuit
Rock 2
Scissors 1
Paper 0


Once the microcontroller receive the digital input (how many circuit occur), it will send the serial value for Processing to read, and Processing will generate different animation determined by the serial value.

5. Let’s play it!

The machine successfully read the gesture and displays the animation (special thanks to Tom Igoe and Daniel Shiffman). The next step is about using this kind of device to play different games with different gesture, such as Thumb-Wrestling, and Hand-Clapping. It might take us to change the device a little bit, such as the size of the box, the sewing on different places for different gestures, etc. It seems like Rock-Scissors-Paper is the only universal game in the world, and now we’ve already built a universal game machine, which hopefully will someday be a best seller in the game industry. So, let’s play it!!

Observation #1--- Shylia with her digital camera

Time & Place: 2006/9/17, M5 city bus, Manhattan, NY 10003, US

Intro:
We often find things or tools hard to use in our life, or using them awkwardly; Probably everyone has that kind of embarrassing experience (like those transparent glass of hotel lobby doors, are too clean to be noticed, and often bumped by incautious guests).

Things designed by manufacturer to serve people are sometimes not so considerate to fit in people's working behavior, custom, or even culture. In order to develop good physical interfaces, designer need to know how people use existing ones. By developing the habit of detailed observation of what people physically do when they use technologies, we can limit your assumptions before developing a serious design idea, and will help designers solidify their concept for user center design.

Observation Rule:
Observe people using electronic product without notifying them the observation in advance.


TARGET: Shilya with her digital camera


Process:
On a bus, a beautiful Sunday morning, Shilya took her small pocket type digital camera (Panasonic FX-07) out from her bag. She touch something (button maybe) on top of the camera, and then the screen on the back of camera glowed. She lifted the camera and started watching the screen, with her eyes shifting between the camera screen and the bus window (maybe it's not the window itself, instead, the scenery outside the bus, which I could not determine).

After she aimed a while without pressing the shooting button, she start to looking for something on her camera (might be a button or a switch). Finally she press something on the top of the machine, in the right corner (might be a button or something). She start shooting random people, and kept doing shooting till she left the bus.


Interview and Comment:

I did a small interview with Shilya after she finished the shooting procedure. For an assignment from school class, she has to write down things interesting that she saw on the bus tour, what inspired her and what she thought after the trip. She wanna record things she saw from a bus passenger view, and try to imagine what people see and how they feel while strangers surrounding, passengers come and go, different races travel in different paces.

In order to take photos quickly in an unstable situation, Shilya bought an new camera because she want to have the anti-shock function, which allows her to take photo quickly on a bus, subway, or any kind of vehicle. The new gadget is one of those famous anit-shock type of digital camera, which overcome the shaky hands problem result from slow shutter of average digital camera. When She pressed the "anti-shock" function button, the camera immediately actuated the function to prevent the photo influenced by the shaky bus or shaky hands.

Welcome!

Welcome to Roger TSAI's ITP Blog. Here you will see things happening when I'm in ITP class, telling ITP stories, sharing my thoughts, and demostrating on-going project. No matter I like it or not, happy or sad, I'll keep posting every happening detail in NYU-ITP on this blog.

Hope to hear from everyone, and your comments and questions are highly welcome; Enjoy it!